...and why you don't need a whole microscope just to test firmware
What Is the TestBench For?
A transmission electron microscope (TEM) from Thermo Fisher Scientific is a massive piece of machinery. It weighs tons, takes up an entire room, and costs millions. Our team at the Olomouc office of Edhouse was tasked with the software that orchestrates firmware updates on these microscopes. We needed a way to test it. Since we didn't have a whole microscope at our disposal, we built a TestBench.
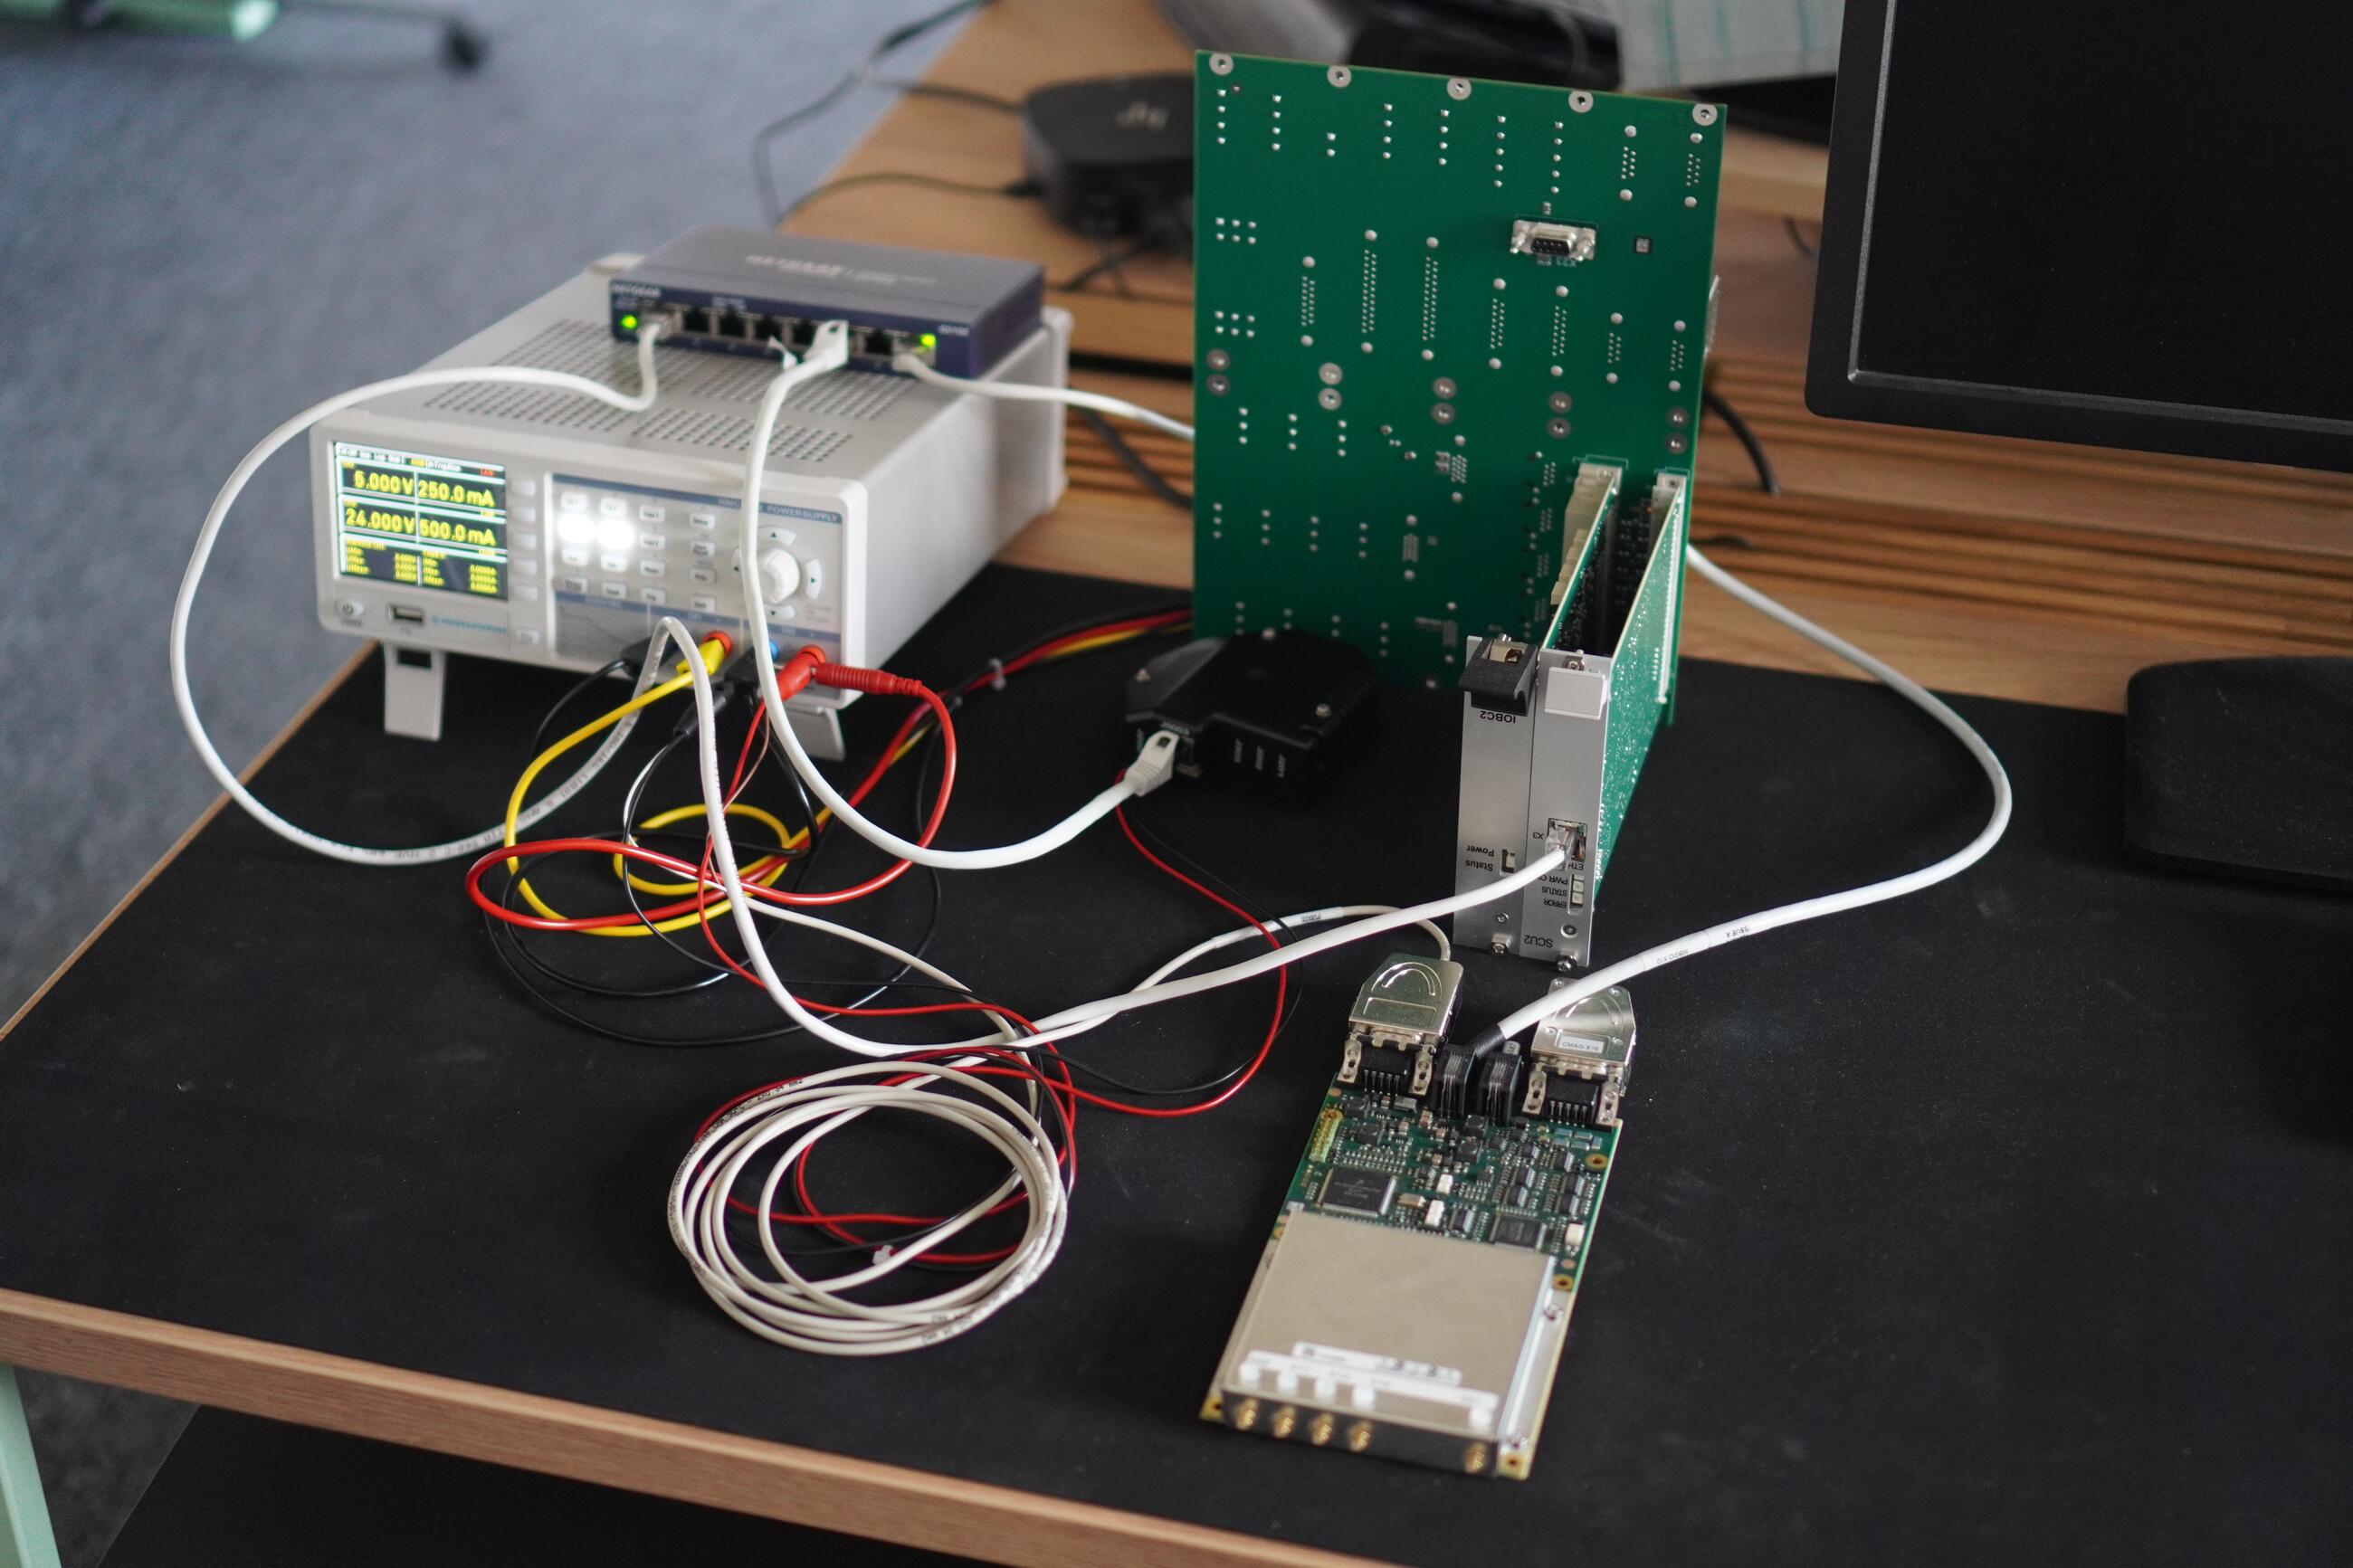
The TestBench is a small piece of hardware where we can install our software without relying on simulations. No mocking, no virtual environments. But real hardware giving real responses — just on a miniature scale.
Why We Need It
As the TEM Installer team, we develop the application that manages firmware updates on the microscope. The catch? There is no simulation environment for this application.
In the past, we mostly had to rely on testers and system owners over in Brno. They would run the tests for us on live microscopes. However, this required a lot of back-and-forth; we had to describe exactly how each test should be executed, and we could only see the results through logs. Sometimes we traveled to Brno in person, but every trip meant coordinating with lab technicians and dealing with limited time on the machine.
The choice was clear: build our own test rig right here in our office.
This came with a great side benefit, too. Having our own Microscope PC (MPC) allows our tester to verify other scenarios as well—not just firmware updates.
What’s Inside
The TestBench contains three types of boards that mirror what you would find inside an actual microscope:
The whole setup sits on an anti-static mat. It lights up nicely and is cleanly wired. The MPC sits under the desk. A developer or tester can just walk up, switch it on, and start testing.
The Road to a Complete Rig
The entire process took about a year. We started in May 2024, gradually gathering components, cables, and terminators. Some parts had to be custom manufactured to specification. By April 2025, we finally had everything together.
The actual assembly was surprisingly straightforward — we managed it after a single meeting in Brno, where our colleagues from Thermo Fisher Scientific explained how to connect everything. The most time-consuming part was coordinating the deliveries of the individual components.
Escalation as a Catalyst
In May 2025, a major escalation came in from the Brno factory. During installation, the TEM Server — the main program controlling the microscope — failed to start.
The culprit? The server runs a firmware validation check during startup. If any hardware that is supposed to be connected according to the configuration is missing, the server halts the boot process. This makes the microscope completely unusable.
Up until then, we only had a rough guess from the logs as to what the problem might be. We couldn't reproduce the bug in a simulation environment. Only thanks to the TestBench — using real hardware and intentionally disconnecting a component — we managed to replicate the exact log errors. Suddenly, we knew exactly what to fix.
The fix had to cover multiple release versions — practically spanning about a year of development, since Thermo Fisher rolls out releases on a quarterly basis.
Where We Are Now
All the hardware is wired up and working perfectly. We installed Macrium — a disk imaging software — on the MPC, which allows us to swap between different drive images on the fly. This means we can have various software versions pre-installed and bounce between them effortlessly.
Looking ahead, the TestBench opens up even more possibilities. When a new hardware device is introduced to the microscope, we can kickstart development for its firmware update support much earlier — without having to wait for access to a full machine.
Our next step? Automation. We want to automate firmware update testing so that it runs in regular iterations without needing manual oversight.
Key Takeaways
You don't need an entire, complex machine just to test a specific piece of its functionality. You just need the relevant parts. The TestBench is proof of that — a few boards, a power supply, a switch, and a single PC allowed us to reproduce production bugs that would have otherwise cost us trips to Brno and hours spent waiting for microscope availability.
If your team is facing a similar challenge — complex hardware and zero simulation environments — take a moment to think about whether you truly need the entire system. Chances are, just a piece of it will do.